7 Tips To Getting A Strike Everytime In Bowling
Everyone who bowls has the same goal: to strike. Whether you’re an amateur or a serious competitor, getting a strike is one of the most enjoyable moments of your life. If you are like me, you may ask yourself, “How do you get a strike every time in bowling?” Well, many factors are considered when attempting to get a strike with every play.
In order to get a strike every time in bowling, the following is essential: prepare your equipment properly, know your plan of action, establish your stance, learn the art of timing, know the speed needed, how to throw your bowling bowl accurately, and you must consistently hit the pocket.
The above are essential for getting a strike every time in bowling. However, there are more factors to be considered. This article will help you understand everything involved with getting a strike every time in bowling.
How Do You Roll More Strikes?
- Prepare your equipment
- Create a plan of action
- Establish your stance
- Learn the art of timing
- Discover your right speed
- Throw the ball accurately
- Hit the pocket consistently
Here we will get into more detail about how to roll more strikes when you are at the bowling alley.
Prepare For Equipment
Here are some valuable tips on how you can choose your bowling equipment. Choosing the right equipment for bowing is part of how successful you will be when playing the game. Other factors include shoes, socks and any hand or wrist accessories.
Determine Which Ball To Use
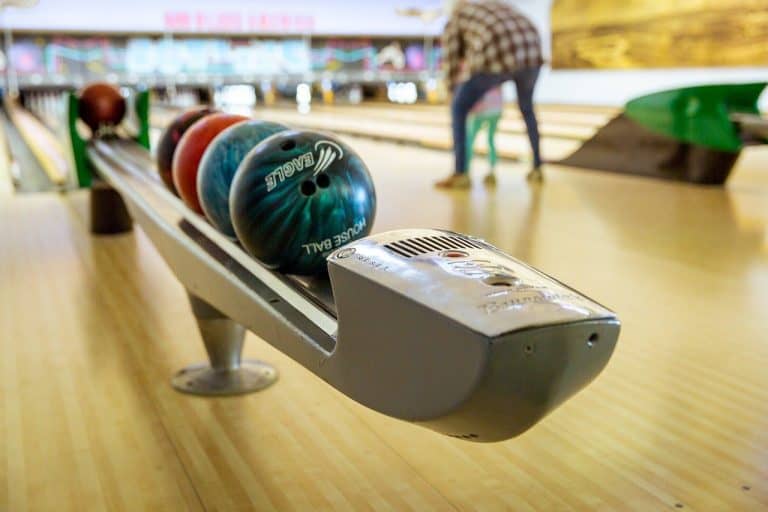
Choosing the right bowling ball is essential to improve your chances of getting a strike. Although throwing the heaviest ball possible can be the best strategy, it’s not always the best choice. A lighter ball might allow you to better control the roll.
Before you start playing, it’s essential to determine if you’ll use a house ball or house shoes. Both of these are inexpensive and can be used at any bowling alley. They can provide a variety of house balls at no cost. A shoe rental fee covers your entire session.
One of the most common options is buying a ball designed for specific needs, such as grip, stroke, and release. The resident pro can do on-the-spot fitting and drilling at the bowling center. Before buying a ball, you must talk to a pro about the type ideal for your budget, skill level, and goals.
If you need help deciding which type of ball to choose, take a look at my most recent recommendations or stop by a local shop.
If you’re planning on taking your ball to a big-box retailer, you should avoid this step unless the store has a sports-related equipment selection. A pro shop can provide you with free practice drills and guidance.
Choose Your Grip
Consistently getting strikes regularly also depend on your grip. There are two main types of grips when buying a ball: the conventional and the finger grip ball.
The conventional grip is for those who are playing with a house ball. You can also change the angle and radius of the ball to make it fit your needs.
The pro will adjust and measure your equipment during the next few games. Should there be additional fees involved, please inquire.
On the other hand, the ring and middle fingers only go inside the ball’s first joint using a fingertip grip. This grip can allow you to leverage at the release point, increasing spin and improving shot performance.
The standard grip comes with holes for your fingers, lined with rubber. This type of grip provides a firm hold, and the pro will set you up and make any adjustments free of charge.
Ball Drilled And Fitted
You will need to have your ball fitted and drilled. You must visit a bowling store and get an expert to measure your hand before fitting and drilling the ball. The expert will take the proper measurements of your hand to ensure the ball fits perfectly.
Choose Your Bowling Shoes
You have to choose the right bowling shoes for your game. Bowling shoes are made from soft rubber and feature a smooth and rapid stopping effect. The leather uppers are designed to glide over the boards and tees.
If you need to borrow shoes, you can do so at the front desk and pay for them while you pick up your lane number.
If you’re in a bowling league, buying your own shoes is better than renting them all the time. This will save you money in the long run, as you won’t pay out every time you visit the bowling alley.
Determine A Good House Ball
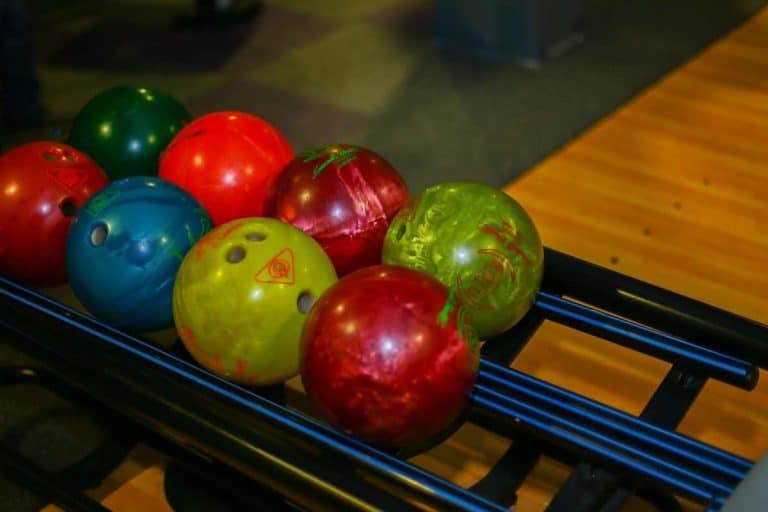
Bowling accuracy may be different when using a house ball. You’ll likely find bowling balls with various weights and colors, and their markings can differentiate them. The key to the color-coded option can be displayed in a prominent location. If you have any questions, you can contact the front desk.
Pick up a ball that is somewhat light to determine the correct initial weight. As you do this, extend your arms in front of your chest and cradle the ball in your hands. The ideal weight is the one you can comfortably hold for only a few seconds.
It should be replaced with a lighter ball if it begins to fall. It should be considerably lighter if held for an extended period of time.
It would be best to aim for the ball you can control with the least force. Doing so will allow you to avoid getting inconsistent results.
The type of ball you choose should also be spread evenly. To prop it up, use your non-dominant hand.
Know Your Finger Hole Size
After finding the ideal balls for your needs, choose the most comfortable finger holes. If your fingers are too big for the holes in the balls, your choice of weight might be too light. Also, ensure that the finger openings are tight enough.
To slide your thumb through the opening, simply stick it through the hole. Doing so will allow you to easily slide the thumb in and out of the hole. If the thumb’s opposite side touches the hole, it’s the right size. You can try a different one if it’s too big or too small.
Plan of Action
One of the most critical factors you can consider when getting a strike is your approach to the lane. According to experts, this step should be followed with care and precision.
Before throwing an object, take four steps with the foot opposite your throwing hand. Keep in mind that the second arrow should be pointed to the right. If you’re a left-handed bowler, aim for the second arrow from the left.
Establish Your Position
Try different starting positions and distances from the foul line. Stick with the one that gets you the best results. Your posture and stance are also important to your accuracy. If you want to bowl effectively, the approach should typically start on the same side of the center lane as your throwing hand.
To improve your technique, keep the arm loose and focus on a narrow stance and a straight arm during the backswing. Here are the following steps for the proper starting position:

Find Out How Far You Are From The Foul Line
To start, face away from the pins and move toward the foul line. Then, walk toward the goal line with a step toward the ground marked by your toe tip. This exercise often goes from the start of the approach to the five long dots.
Your natural gait might cause you to veer off your intended path. In this case, you should start your approach with your feet in several different spots, and gradually increase your strides toward the foul line. I have used a 5 step approach my entire life. 4 steps is most common, while some will even use 3 step approaches.
Crossing the foul line results in that roll remaining unscored, and you move on to the 2nd roll or next frame. Even though you have a chance to make two or three shots in each frame, you still miss.
Practice Makes Perfect
To bowl consistent strikes, you’ll need frequent practice. After a couple of practice sessions, check the ball’s position on the ground. It’s crucial to align your shoulders and maintain a straight arm stroke to bowl naturally.
You can increase your chances of hitting the ball with a pocket by focusing on it. This way will allow you to make an accurate aim and successfully score a point. Before you start swinging, keep your non-dominant foot on the center dot.
Also, the pocket’s center is located on the 17th board of the pin deck. For instance, if a right-handed bowler bowls, the pocket is on the right edge of the lane. The headpin’s center is on the 20-board, the bowling lane’s center.
Learn From Your Missed Rolls
Make sure to mark your missed throw in the direction of your omission. If you did, start throwing the ball to the right side of the center point, and if you veered left, turn right. It is counterintuitive, suggesting you’re late or too early with a hook.
As you go around your miss, the ball will remain dead. After a few sessions of practice, you should be able to get into a good bowling stance and feel confident about your game. You can then adjust the frequency of your throw to target the ideal target.
Learn the Art of Timing
The timing of your release is also essential when it comes to getting a strike. If you want to hit the ball far, keep your swing at its lowest point and let go of the ball.
Also, avoid dropping the ball into the lane while attempting to hit it. On the other hand, if you want to throw the ball in the air, do so while still holding your breath.
In practicing your curve, make a track in the direction of your missed shot. If you miss the right side, start throwing the ball to the left side of the center point. If you veer left, start throwing the ball to the right side of the center. It’s a counterintuitive move, yet it shows that you’re late or too early with a hook.
The ball will stay on as you go around your miss. After practicing, you must establish your ideal stance. It will allow you to throw with more frequency.
Discover Your Right Speed
Although it’s a good idea to use a bowling arm as a rocket launcher, there are more accurate techniques for hurling the ball. In specific lanes, the ball’s velocity can be measured. If you notice that you are consistently knocking down pins, try slowing down your shot speed. If you hit them accurately and slowly, the pins will stay in the pocket longer. It will allow you to get a strike and clear the deck.
Throw The Ball Accurately
A bowling arm can be a rocket launcher, but it only sometimes produces the ideal results. While it’s fun, throwing the ball accurately is required to pick up pins.
The speed of the ball can be measured in different lanes. If you notice that you are constantly knocking down pins, slowing down the rate of your shots can help. By striking the pocket slowly and precisely, you can lengthen the time it takes for the pins to stay there. This technique will allow you to clear the field with a single blow.
Hit The Pocket
It would help if you struck the ball in the pocket or between the first and second pins. You can also use a curved shot to reach the target.
Before releasing the ball, make sure that you put some spin on it. For right-handed players, the thumb should be rotated to the 10 o’clock slot, while for left-handed individuals to the 2 o’clock slot.
How To Aim For Bowling
Both spot and pin bowling are commonly used for aiming. Before you start playing, make sure that you first look down the lane at the pins. After all, knocking them down is the goal. If you focus on the pins for your entire approach, you are pin bowling.
Pin bowling is a common technique, but it can be improved. Instead of looking down lane at the pins, focus on the reference line on the lane in front of you. In a spot bowling game, the markers small arrows painted on the lane about 15 feet beyond the foul line. This technique will allow you to throw your ball consistently.
If you give it some thought, you’ll realize that the arrows are closer to you than the pins. If the ball goes to the right target, it will continue moving in the correct direction and eventually hit the right pin. It is much easier than aiming at the farthest pin.
Where Do You Hit To Get A Strike?
Since so many factors go into deciding which target to shoot for, it is hard to give a single answer. If you want to throw the ball in a straight line, you should aim for the center arrow from right or left side. Since hitting the head pin straight on often results in splits, it’s better to hit it at a slight angle and slightly off-center (the pocket) to maximize your pin motion.
The first step in getting a strike is hitting the strike pocket between pins 1 and 2 in left-handed bowling. On the other hand, in right-handed bowling, the pocket is between pins 1 and 3.
Right-handed bowlers should aim toward the right side of the center arrow, while left-handed individuals should aim toward the left. If your ball curves or hooks, consider this when choosing your arrows.
Having the right combination of hook and speed will allow you to get multiple strikes and improve your score significantly.
Also, before taking a shot, align your feet with the dot or board in the area you’re aiming for. If you need help deciding which direction to go, you can try shifting your footing or aiming for the next arrow.
Why Throw A Hook Shot?
Hook shots are a great way to try to get a strike.
A strike is most frequent when the ball hits the pocket at an angle of 3 to 6 degrees. To achieve the ideal entry angle, you rely on friction of the lane and spinning of the ball. Lane oil conditions will vary, so your speed, rotation and angles may need to be adjusted.
Use the warm up period to scout lane and ball behavior. Watch for lane condition change as the game progresses. The most significant difference between intermediate and beginner players is the ability to throw the ball with the right entry angle and adjust for different conditions to do so.
How To Thow A Hook Shot?
This method is explained in detail, but here’s a quick overview. It involves swinging the ball like a pendulum as you go toward the foul line. At the same time, you slide to a stop right at the line.
The catch is made when the ball is released in the right manner. It can be accomplished by spinning the ball onto the dry boards and making it hook.
The direction of the ball’s spin will be determined by which hand you use to throw it. For instance, if you are right-handed, the ball will go counter-clockwise, while if you are left-handed, it will go the other way.
Starting Position
Let’s assume you are a novice right-handed player. Begin by placing your left foot on the middle dot of your circle. While standing, rest your right foot behind your left. Keep the ball at chest level, and ensure that your left-hand doesn’t touch your leg while bending to the right.
Aim
Your target is between the third and second arrows from the right. To ensure that your eyes stay focused on the ball, put your left foot on the target’s center dot. Your eyes should focus on the mark when you start moving toward the ball.
The oil pattern, your shot, and the direction of your ball affect a player’s strategy. For most people, starting in the middle is a good starting point. However, this can change depending on their visual target and feet.
Practice The Push Off, Swing, Steps, And Slide
The pace of this process changes dramatically as it starts. In this tutorial, I’ll go over the four steps to explain it. There are many variations, but they all depend on the 4-stage process.
Step forward with your right foot and push off at the same time. After reaching into position, push the ball in front of you until your arm is straight, letting it drop to start your swing. Make sure that your arm is completely relaxed and swinging freely.
Your fourth step should be released as it crosses the foul line, and you must have timed it correctly. The slide is a method of losing forward velocity that involves taking the fourth step in the sequence. It would be best if you stopped sliding as the ball approaches the line.
As I wrote earlier, I use a 5-step approach. I learned this very young, and I never went away from it since I have short stride length.
Master The Release
The release is one of the most challenging components of a shot. It can help you maintain the ball in play and give it an inward spin.
The term “revs” refers to the process of inward rotation. One of the most important things to remember when mastering the release is that it can be done. The shape of the holes and how the ball moves from one hand to the other will determine how many revs will be produced.
Here’s how you can master the release:
- The wrist should be straight, and the ball should be at your side. It can be done with the right ball. Keep in mind that keeping the ball in place can be a bit challenging, depending on your hand size. At the moment of release, make sure your thumb points down and your palm faces your leg.
- The red line shows the ball’s rotational axis. The red line can be interpreted as pointing in the direction of the pins. If you are holding the ball correctly, it should be facing like the one shown in the picture. To visualize this, have the ball in this manner and allow your thumb to slide out of it.
- The upward power of your fingers will determine how well you can keep the ball in place. If you keep your fingers tight, the ball will fall around the axis and cause a spin.
- Your thumb should be the first thing to come out of your hand as you swing the ball toward the foul line. The timing of your thumb release is critical, as it can affect how quickly it flies and how far it goes down the lane.
Understanding this will allow you to avoid getting the ball thrown too early or too far down the lane. Let it settle a bit.
- Keeping your fingers apart prevents the ball from moving in your hand once it’s released. The thumb is also kept loose, so you can quickly pull it out if needed. It is a learning process, as you’ll have to get used to holding objects with your fingers and thumb tightly together.
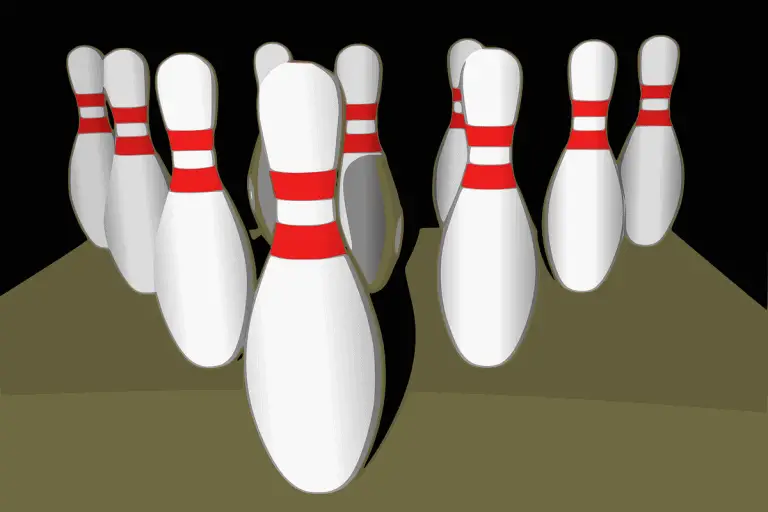
Conclusion
It is very satisfying to watch as a whole set of 10 pins are sent flying into the backstop. Learning to bowl can be challenging because no one technique works for everyone. A good grasp of aiming is essential to ensure that your stroke works appropriately.